New Reverse Repair Patch Kits
Our Reverse Repair Patch Kit has been designed for when you want to repair a hole in fabric from underneath.
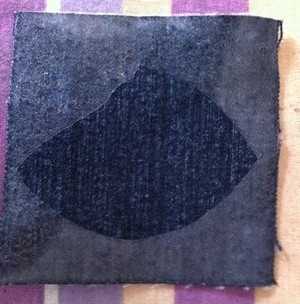
Kits contain matching size squares of fabric and iron on adhesive

….and are available in denim
…and poly cotton floral fabrics.
INSTRUCTIONS:
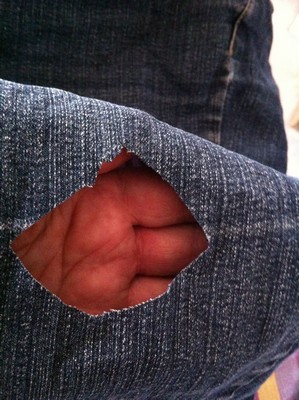
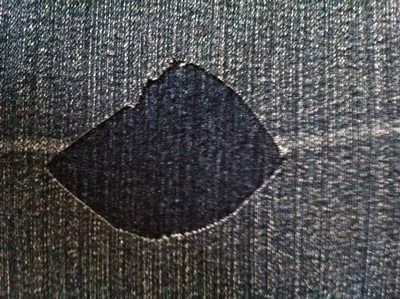
1. Ensure your patch is large enough. If the hole or tear is untidy, now is the time to cut a more uniform aperture if you want to.
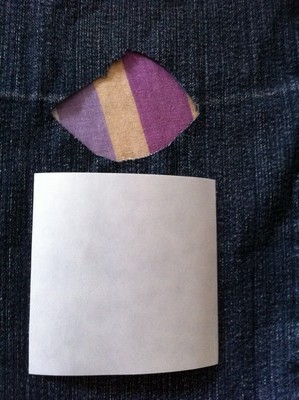
2. It's essential to have plenty of margin around the hole you need to repair so there is adequate room for glue coverage. Patch kits come in two sizes, 10 x 10cm and 15 x 15cm..
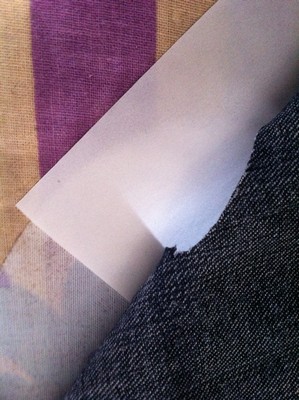
3. Place glue sheet underneath fabric, shiny (glue) side down. Ideally keep the straight edges of the paper running in the same direction as the grain of the fabric

4. Carefully mark the edges of the hole on the glue paper with a pencil. Now is a good time to also mark the direction of the fabric grain on the paper with an arrow which will help placement of the patch later.

5. Cut about 2mm outside the edge of the pencil marks so the paper hole is very slightly larger than the one in your garment.
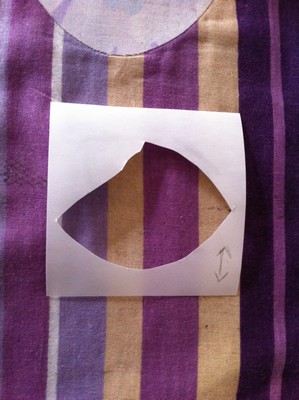
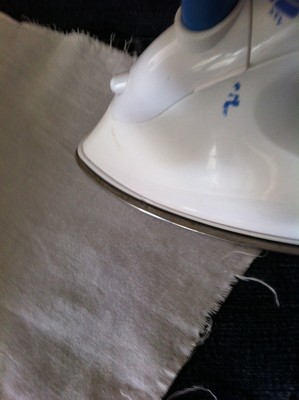
6. Place glue paper on top of the right side of the fabric patch. Make sure the arrow you've marked is running in the same direction as the fabric grain. Iron paper
7. Iron glue paper onto fabric patch with a medium hot iron for 5 – 20 seconds. Allow to cool briefly.

8. Peel off adhesive backing paper

9. You should clearly see the layer of glue coverage once you've peeled the backing paper away.
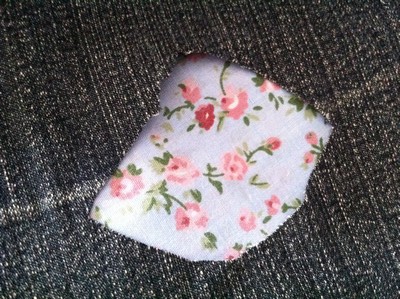
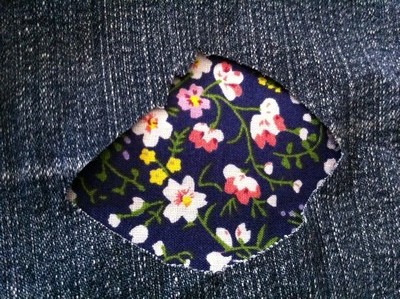
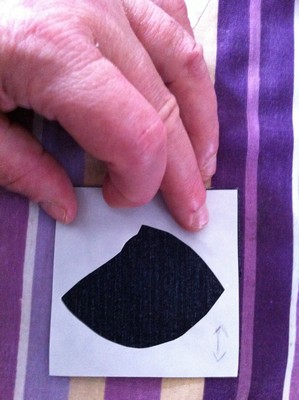
10. Place fabric patch behind hole in the garment. Make very sure that the patch is placed so that there is no glue showing around the edges of the aperature (as in the picture below) as this could stick to the hot iron and make a mess.
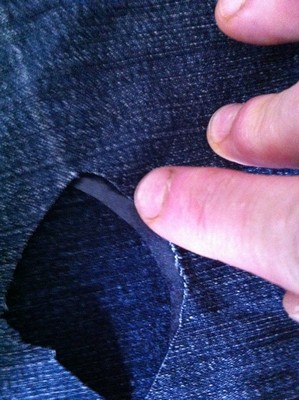
11. The placement of the patch in the picture below is correct.

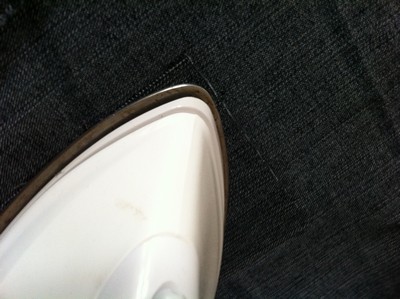
12. With a medium to hot (not max temp) iron, press over the hole briefly for initial fix, then cover area with a thin, slightly damp cloth (a muslin or thin tea towel works well) and press for 20 – 60 seconds from both sides of the repair until garment and fabric has dried and a good fix has been achieved.
13. Pay attention to the edges of the patch, but avoid lifting them to check for fix until fabric has cooled.
14. The finished repair. Providing your Reverse Patch has been applied correctly, the glue used for it should give a good fix for items washable at 40 degrees without further sewing, but for a better finished appearance, we always recommend sewing around your repair by hand or machine.
Running stitch using contrast embroidery floss.

Why not try a chain stitch or other decorative embellishment.
